In this step-by-step guide, we will walk you through the process of regripping your golf clubs, from gathering the necessary materials to removing the old grip and installing the new one. By following these simple steps, you can ensure that your clubs are equipped with fresh grips that will help you play your best game on the course.
Tools and Materials Required
Before you begin the regripping process, you’ll need to gather the necessary supplies. This includes a new set of grips, grip tape or solvent, a utility knife or scissors, and potentially a vise or clamp to hold the club in place. Ensure you have all the tools ready to make the process seamless.
STEP-BY-STEP GUIDE
Step 1: Removing the Old Grips

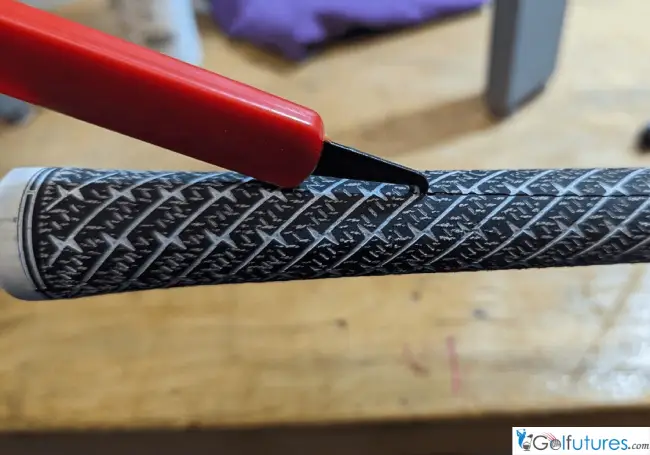
The first step is to remove the old grips from your golf clubs. Start by cutting through the grip near the butt end using a utility knife or scissors. Be careful not to damage the shaft of the club. Once the grip is severed, gently pull it off the club. If the grip is resistant, you can use a grip solvent to help loosen it.
Step 2: Cleaning the Shaft
With the old grip removed, it’s time to clean the shaft. Use a degreasing solvent or grip tape remover to thoroughly clean the shaft, ensuring there is no residue or sticky material left behind. This will help the new grip adhere properly.
Step 3: Applying the New Grip Tape

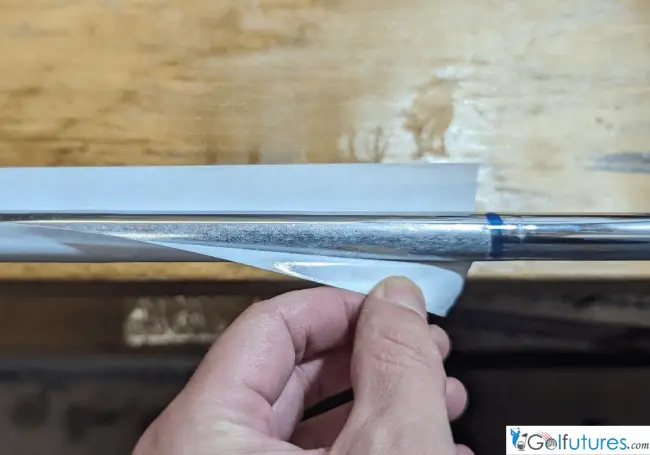
Next, you’ll need to apply the new grip tape to the shaft. Start by cutting the tape to the appropriate length, leaving a few extra inches on each end. Carefully wrap the tape around the shaft, overlapping the edges slightly. Ensure the tape is applied evenly and without any air bubbles or wrinkles.
Step 4: Sliding on the New Grip

Once the tape is in place, it’s time to slide on the new grip. Apply a small amount of grip solvent or water to the inside of the grip, then gently work the grip onto the shaft. Ensure the grip is aligned correctly and positioned where you want it.
Step 5: Securing the Grip
To secure the new grip, you’ll need to use a vise or clamp to hold the club in place. Apply firm pressure to the grip, working your way from the butt end to the clubhead, ensuring the grip is tightly secured to the shaft.
Step 6: Finishing Touches
Use a utility knife or scissors to trim any excess grip material at the butt end of the club. This will give your clubs a clean, polished look.
Remember, proper regripping is essential for maintaining control and consistency in your golf game. By following these steps, you can ensure your clubs are equipped with high-quality, properly installed grips that will help you play your best.
FAQS
Q: What is the best way to remove old grips?
A: To remove old grips, cut them lengthwise with a utility knife, being careful not to damage the shaft, especially if it’s made of graphite. Peel off the old grip and any remaining tape residue.
Q: What are some common mistakes to avoid when regripping golf clubs?
A: Common mistakes include not removing the backing from both sides of the tape, not using enough solvent, and not working quickly enough to prevent the solvent from drying before the grip is fully in place.
Q: How do I choose the right grip size?
A: Grip size should correspond to your hand size for optimal comfort and control. When holding the club, your fingertips should just touch the base of your thumb. If they dig in too much, the grip is too small; if they don’t touch, the grip is too large.
Q: What materials are needed for regripping golf clubs?
A: You will need new grips, double-sided grip tape, grip solvent or mineral spirits, a utility knife, and a vice or rubber clamp to hold the club steady during the process.
Q: How do I ensure the new grips are aligned correctly?
A: After applying the solvent, slide the new grip onto the shaft and adjust quickly for alignment before the solvent dries. This may include aligning any logos or patterns on the grip with the clubface.

![How to Regrip Golf Clubs: [STEP-BY-STEP GUIDE]](https://golfutures.com/wp-content/uploads/2024/04/How_To_Regrip_Golf_Clubs.webp)


